John's
Plane Week 11 September
13, Monday This
morning at the Dairy Queen I find Mark having breakfast
with Lester Morrison, who has driven over from Linton,
IN to get a new seat tank for his two place. I know Lester
has been an auto mechanic for much of his life so he'll
be interested in what we have planned for today. 
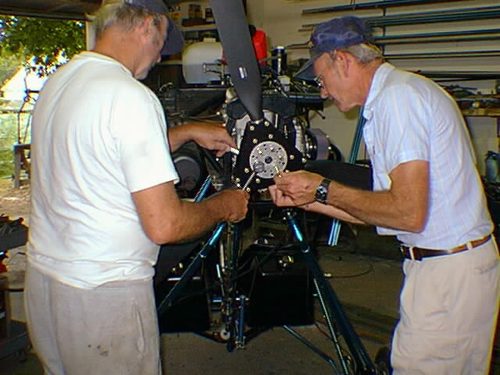
Mark and Lester and I assemble the 72 inch 3 blade Warp Drive prop and install it. The parts are packaged tightly along with a protractor for setting the pitch of the blades. We slide hub plates and spacers into place and slip the bolts through their proper holes and snug them lightly. Once we are sure everything is squared off, we tighten them to the required torque, moving from bolt to bolt diagonally across the hub and going round twice to turn the final torque. Here Mark and Lester are working on the prop. 
Mark sets the angle of each blade roughly, then attaches the protractor on the end of one blade and sets it roughly. He then matches the other two blades to the first, and we are ready to test run the engine. Here is a shot of where the protractor is place to read the angle of pitch. Notice it is way out at the very end of the prop and the protractor is behind the prop. This would be true even for a tractor configuration. 
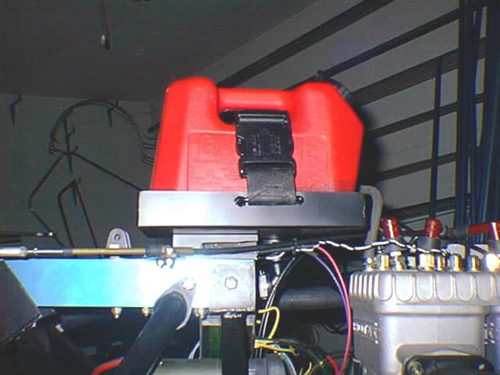
As per Mark's instructions, I add gearbox oil to the gearbox until it begins to trickle out of the lower "fill to" plug. Mark advised me to do this slowly because the delay of the oil flow across the gears would fool me--and it did. Several tablespoons of oil dripped out before it stopped and I felt it safe to screw in the "fill to" plug. Too much oil in the gear box would create unwanted pressures and damage the box. I safety wire the plugs, lower and upper (the upper is not functional but would be if the gear box were installed in the opposite direction as it could be) and the drain plug. All are predrilled for this purpose. The actual fill port is at the very top of the gearbox and would exchange places with the drain plug if the installation of the gearbox were reversed. We push the trike outside for the test run. I sit in the right seat, and reaching comfortably if nervously up to the control panel, turn on the master switch, push the mag switches to the "fly up" position, prime the engine twice and press the starter button. Click. The solenoid is willing but the battery is weak. Try again. Click. Mark steps up to hand prop and the engine fires on the first turn, but I am not quick enough to catch the prime. "Once more," Mark says. "Ready?" He swings the prop once more and this time the engine gives out a full throated roar and the trike moves forward a bit. I pull the brake and Lester wedges his foot against a tire. I check the instruments and am gratified see the tach is working. The left (rear cylinder) EGT gauge moves up and I am anxious about the right gauge standing on zero, but soon enough the right comes up, too. Mark signals to increase power a bit as he does when he is giving flight instruction, and I run the engine up to 5000 rpms briefly, then cut it back to 3000 rpms. The water temperature gauge begins to rise. Well, what do you know? All the wiring is right. Mark makes the slash sign across his throat and I switch the mags off. We are all happy, grinning broadly, and I congratulate Mark who is the brains behind all this. He grins in spite of himself. We put the trike back in the shop and take off for the strip to get Lester his fuel tank and then we go to lunch where we recount the successful engine test to our friends at Lucky Linda's. This afternoon, I drain the water from the cooling system and replace it with a 50% solution of antifreeze. Mark and I look over the trike and he instructs me to safety wire the exhaust springs, six of them in all. September 15 Wednesday This morning we make the shoulder harnesses. Almost as a warm up, Mark sews a buckle to a short belt to fasten the oil reservoir to its pan. Here you can see its fancy belt. 
Then to the main event. Mark studies his plans. He has not made a harness for over a year. I watch him concentrate on the plan. After about ten minutes, he brings out boxes of buckles and keepers and shows me how they will work with the belts. He unrolls the webbing and begins cutting and shows me what to cut next. Mark settles in at the sewing machine and begins sewing. 
I cut lengths as Mark fires instructions at me. I am going step by step, not really understanding, until finally I see a harness and belt taking shape. This next picture shows a layout of parts on the left and a partially assembled belt on the right. 
The entire harness along with its pink release tabs is done in about an hour and a half. I install them on the trike and Mark takes this picture of me showing them off. 
After dinner I start to make ribs from 35 tube lengths Mark has precut. This will supply my plane and restock Mark's supply. I sand each end and debur them. Then I insert the front vinyl tip into a tube and punch two dents into the tube to grip the vinyl tip. Using the jig Mark has built I bend each rib to its proper shape. Here is a rib I've already bent reinserted into the jig so you can see how simple the operation is. 
Next, I make two sets of aileron cables, left and right because they are not the same length. Remember the aileron bell crank sits off to the left of the root tube and therefore the left cables are shorter than the right cables. I need only a bit of instruction from Mark since I have somewhere in the dim past of this project made two sets of flying wires. I also make two aileron strut restraint cables. These run diagonally from the aileron strut to the leading edge of the wing to reinforce the aileron strut which would bend under the stress of the aileron cables being tightened on it. September 16 Thursday Getting closer and closer to finishing the trike. I install two eyebolts on the rudder pedals on which to mount the rudder cable. A castle nut inside the bolt and a nylock outside make a full threaded eyebolt adjustable. Taut rudder cables may not be absolutely necessary but sagging cables look dangerous. I once saw a loose cable get pulled into the prop at start up and the cable was cut. Never even nicked the prop. 
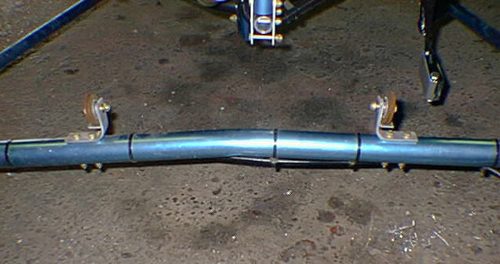
I install four cable pulleys. The two under the seat on the tab welded to the seat support are a piece of cake. Now then, the two I will bolt to the axle are not so simply installed. I cut on the band saw two 4 inch strips of aluminum and drill for two bolt holes and one pulley mounting hole. I bend the aluminum to 90 degrees on Marks bender and realize now I must drill four holes through my axle. Whew. Darn, why didn't we drill these four holes when the axle was just a tube. You know what, drilling a hole squarely through a tube in not so easy. I've said it before and now we have so much invested in this axle I---Well, I block that out and simply put the bracket in place and drill the top side of the axle. I make sure my drill is at 90 degrees on all four compass points and drill the second side. Simple. Thank goodness, all four holes are exactly right. I bolt the pulleys in place. 
The trike is done. Completed. Not a thing left to do but put on the wings and tail feathers and ----well, the trike is done and we go to lunch. After lunch Mark takes two customers, Larry Gehrig and his friend, both from the Chicago area, to the hangars at his strip for parts, but I remain behind to work on--yes the trike. I decide I don't like the pedal action with the nosewheel. My foot must rotate around my ankle too far for me to get a good turn. I plan to copy a device I've seen on Mark's plane and Dan Grim gives me a helping hand in planning. He, too, has such a modification. I design a metal plate to bolt to the pedal edge which will allow me to attach the nose wheel push tubes behind the pedals. This picture shows the completed job. I like the feel much better and get a full turn without straining to stretch my foot further than it wants to go. 
September 18 Friday We have not made the stabilizer because the tubing we need had not arrived until yesterday. Mark needs to make several to ship out and I need one. For shipping, Mark must halve the tube that bends to form the stabilizer but mine can be made in one piece. Mark and I make several for shipment then cut one full length for mine. We drill and bend the tube into shape and after bowing out the leading edges slightly, I slide the sail which we made way back when onto the shaped tubing. I slide the trailing edge through the rear pocket into place, and Mark pops the final end into place with a tool he has devised. I use the hot knife to open holes through the sail into the bolt holes and slide three spars into their battens. Together Mark and I assemble the stabilizer mounting tubes. We bolt the assembly together and it is done. Much easier said, than done.
As you can see, the tail skid is not bolted into place yet.
I load the tail feathers in Mark's Suburban and after lunch
we take them to the hangar at Mark's strip. Next week we
will assemble the plane and break in the engine. We will
be flying by Friday. |
